Tool Tags: Add Order to the Tooling Chaos
Let's talk about short-term, or in-use, end-mill storage. For long-term storage, there are plenty of decent options, ranging from basic bins to Gridfinity systems to fancy digital tool-vending machines. We even designed our own inserts for 22-inch-wide drawers for long-term end-mill storage. While no solution is perfect, there are plenty of effective options available.
However, we didn't have a great solution for keeping track of the tools in the machine at any given moment or the tools that were built up but didn't have a fixed number. This became a problem recently when I needed an 82-degree chamfer tool to make countersinks for imperial screws.
I found one in the Brother machine that looked right. Pretty sure it was right… probably. Then I spotted another one in a tool holder on the Syil rack that also seemed correct. Unfortunately, none of the end-mill boxes had labels to confirm what was what.
My next move was to ignore the built-up tools and check my inventory. I hoped to find a new one in the box that I could be sure of. Even if this approach had worked, it's not a satisfying solution and often leaves you with a pile of mystery, abandoned end mills. In this case, there were no new ones in inventory anyway. So, the archaeological dig began in earnest. Here's what I discovered:
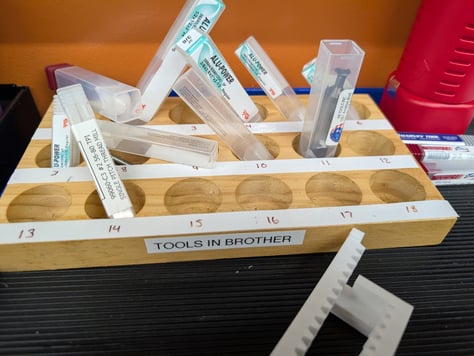
We were using a tray from some ER32 collets as an organizer. While it offered 18 spots, that didn't match the Brother's 21 tool pockets. On top of that, we didn't have anything similar for the Syil, which has 12 tool pockets. The result? A spectacular mess.
The First Attempt: Tool Box Bins
Taking inspiration from Garrett Wade's solutions, I designed some custom tool-box bins. I created a parametric Fusion model that lets you specify the number of rows and columns. Each slot includes a small space for a label if you want to add tool tags. I also incorporated a provision for attaching 3D-printed DIN rail mounts (the holes are spaced 50mm apart, so you can add whatever mounting option you prefer).
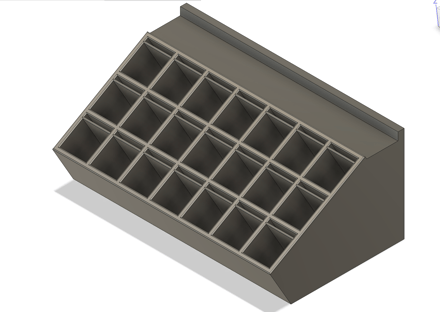
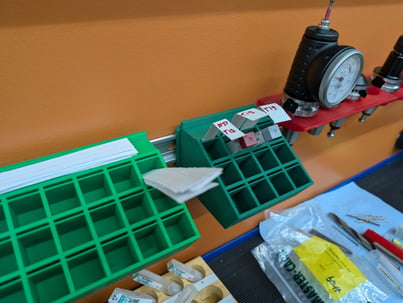
This solution requires some diligence to actually place the tools into the boxes as they are built up, but it felt like a step in the right direction. Here's what the final result looked like:

The Second Attempt: Tool Tags
After using this setup for a few days, I decided I didn't love it. It's very space-efficient, and it does a great job of keeping things organized, but I often found myself needing to go to the machine to check what tools were already loaded. While I could move these bins to the machine, it just didn't feel right.
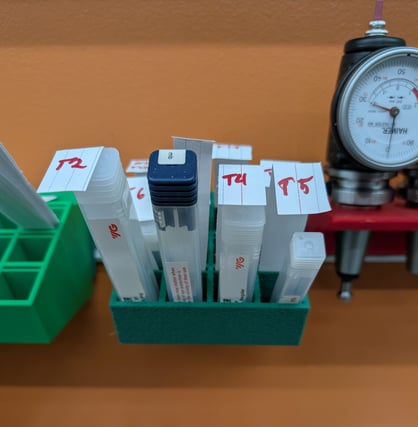
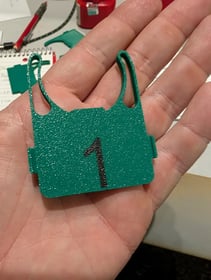
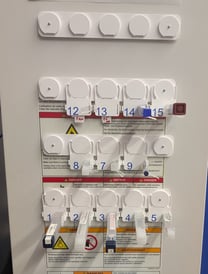
So I moved on to the next idea: keeping the tool boxes attached to tool tags. After a few iterations, I'm quite happy with the final tool tag design. It includes a flexure, and the numbering is printed in place. There's also a slot for attaching a vertical mount to hold the tool tags. Along with the tags, I designed machine mount plates that take an M4 bolt for a magnet and TPU printable straps to secure the boxes.
Here's what the new system looks like:
This new approach brings a little less chaos and a little more order to our workflow — and hopefully, it means a lot less archaeology in the future.